Lab 1.4. - Create the SSL Profiles
In this section, you will define the virtual server IP address and its SSL profile settings.
Task - Create a Client SSL Profile
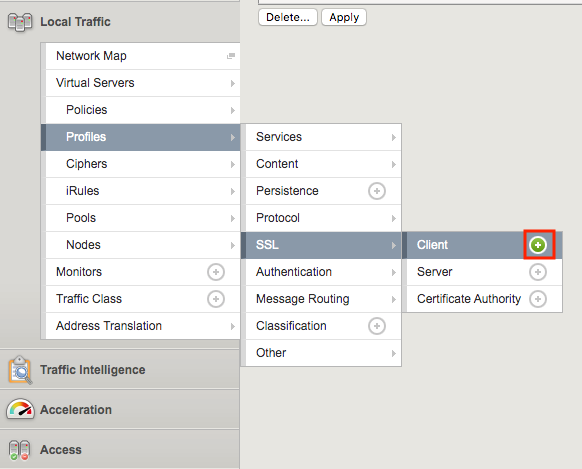
Navigate to Local Traffic >> Profiles >> SSL >> Client, then click the + (plus symbol) to create a new SSL Profile
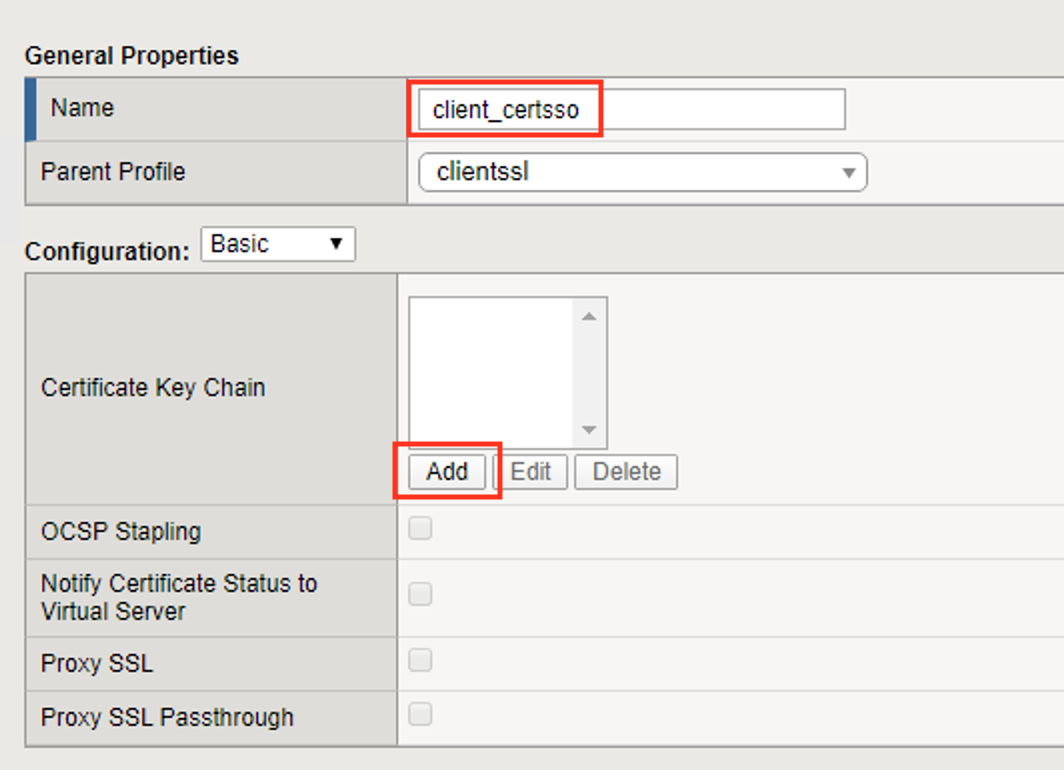
Enter the name client_certsso
Check the custom box to the right of Certificate Key Chain
Click add
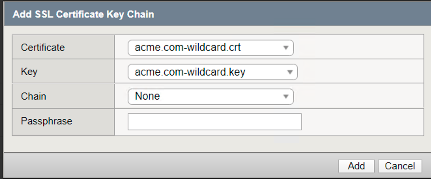
Select acme.com-wildcard.crt from the certificate dropdown box
Select acme.com-wildcard.key from the key dropdown box
Click Add
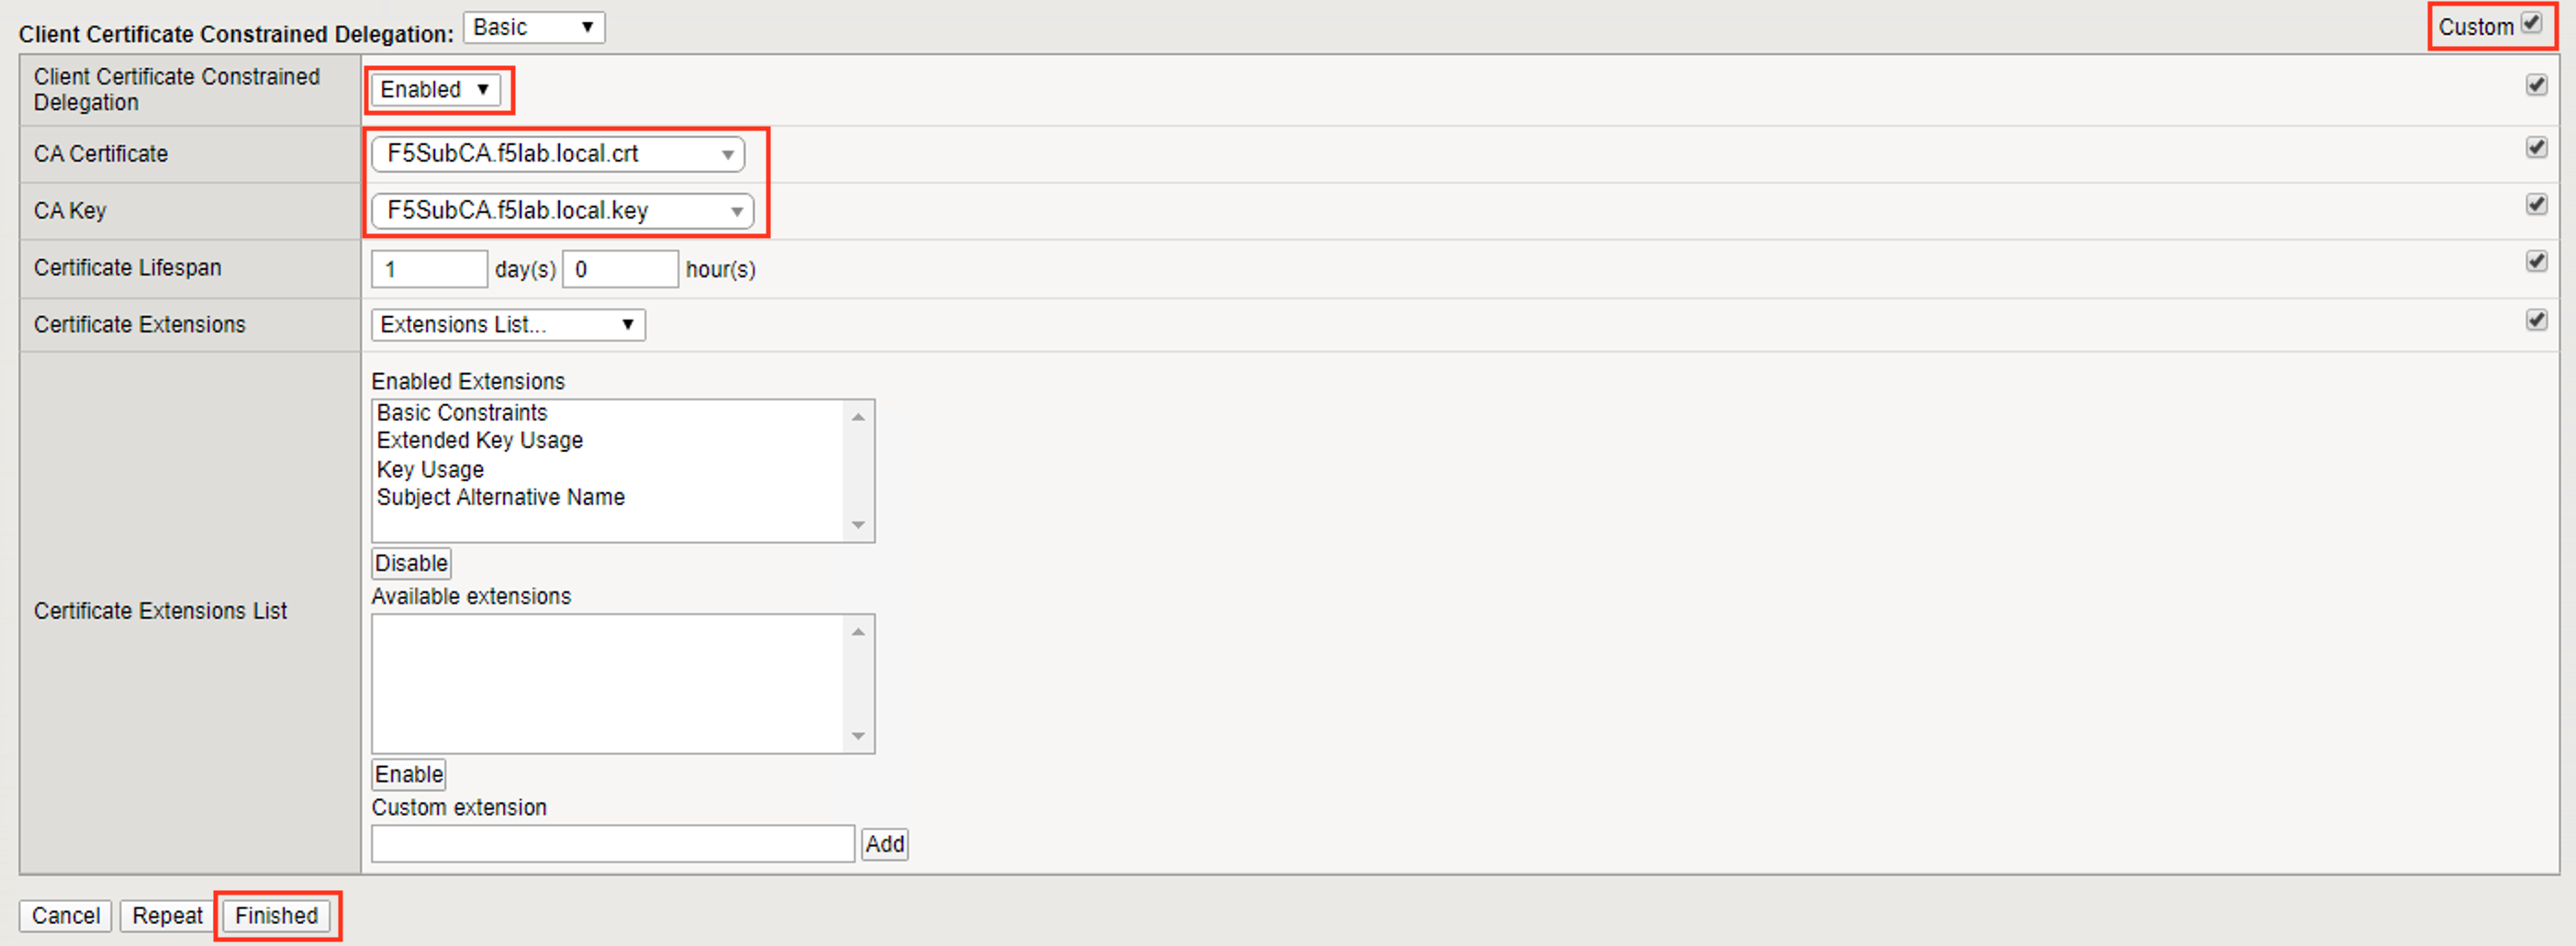
Check the custom box to the right of Client Certificate Constrained Delegation
Select Enabled from the Client Certificate Constrained Delegation dropdown box
Click Finished

Click Finished
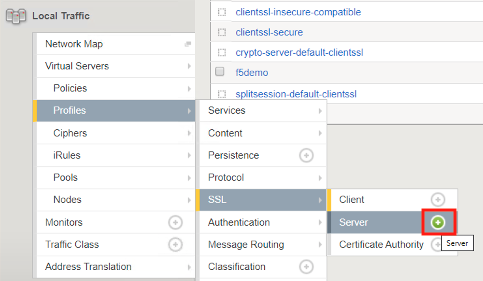
Task - Create a Server SSL Profile
Navigate to Local Traffic >> Profiles >> SSL >> Server, then click the + (plus symbol) to create a new SSL Profile
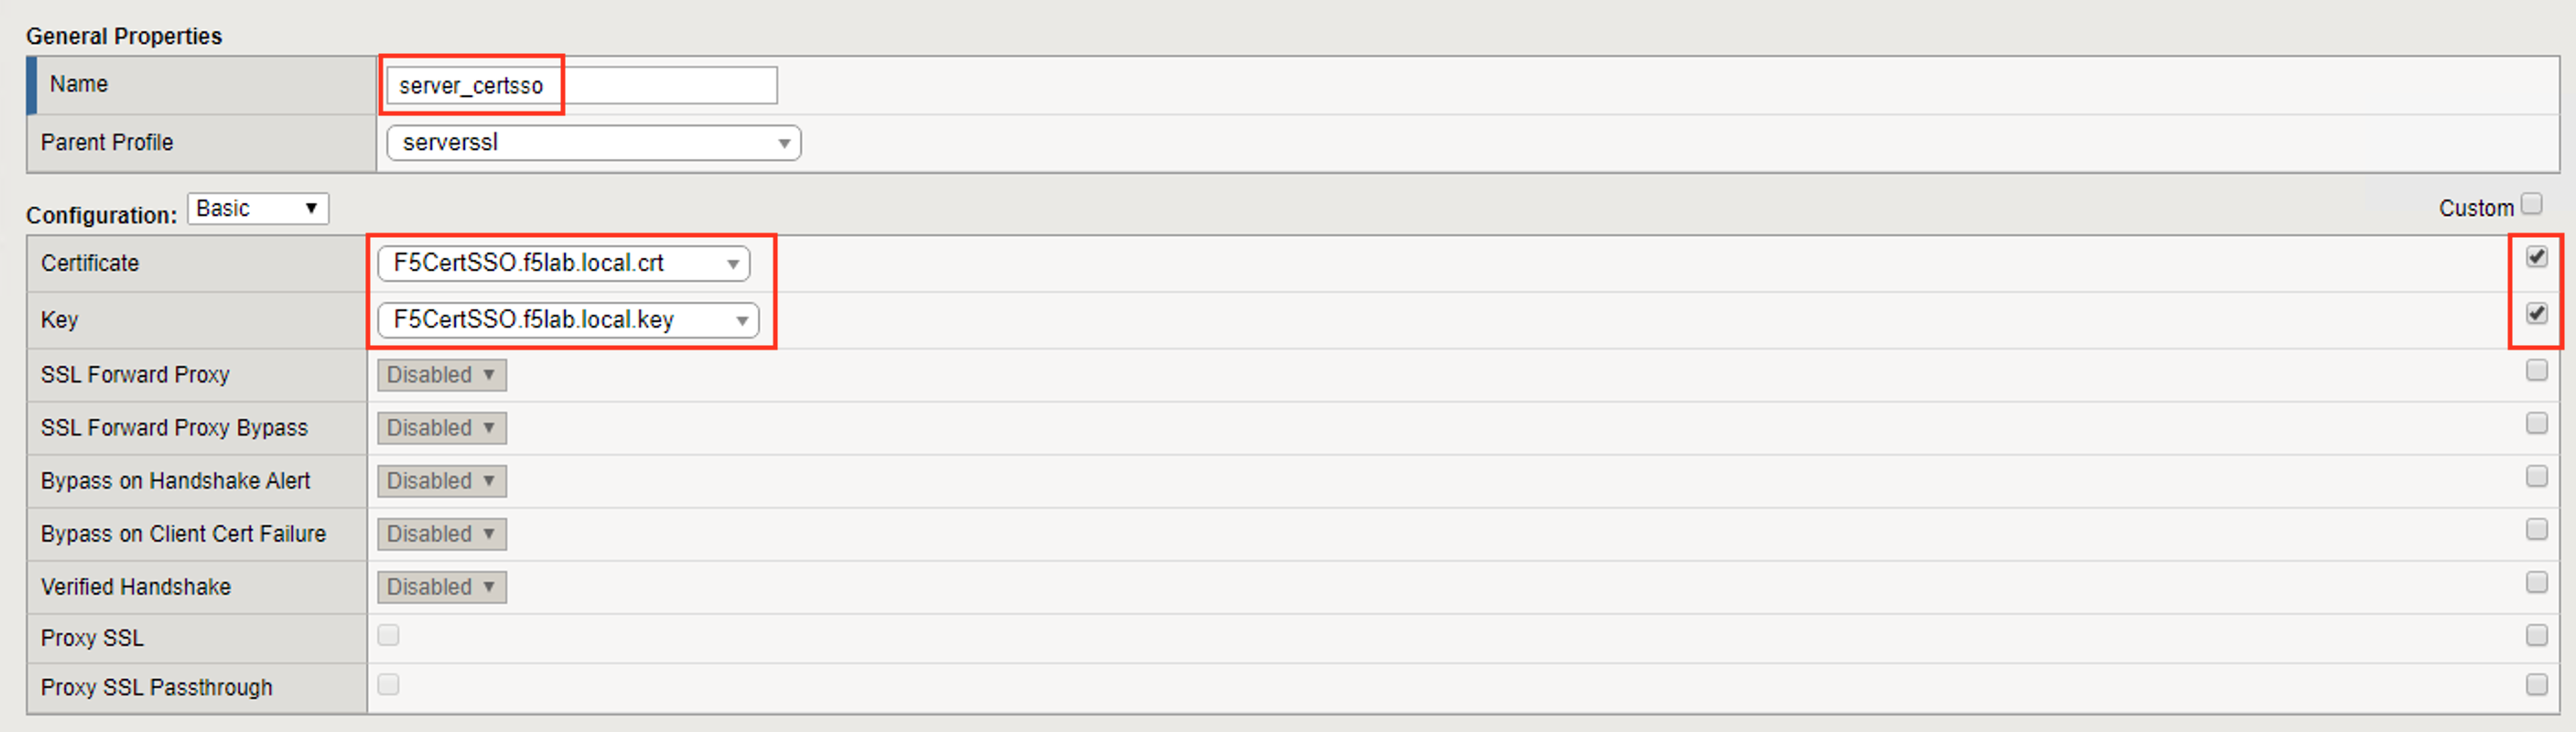
Enter server_certsso for profile name
Check the two custom boxes next to Certificate and Key
Select F5CertSSO.f5lab.local.crt from the certificate dropbox box
Select F5CertSSO.f5lab.local.key from the key dropdown box
Check the custom box about the Client Certificate Constrained Delegation box
Select Enabled from the Client Certificate Constrained Delegation dropdown box
Select F5SubCA.f5lab.local.crt from the CA Certificate dropdown box
Select F5SubCA.f5lab.local.key from the CA Key dropdown box
Click Finished